In the first of a new series getting up close and personal with our artists and their processes, we get a glimpse into the world of linocutting with one of our bestselling printmakers, Margaret Mallows. Margaret joined Artfinder in 2017, she's self-taught and incredibly has been working as a printmaker for only four years. Inspiration for her work comes from her surroundings, garden and everyday things, and is now in collectors' homes in many countries across the world.
What is reduction linocutting?
Sometimes referred to as 'suicide printing' (cheerful!) reduction linocutting is created from only one block of lino, which is cut away more and more, as each colour layer is printed. This means that the whole edition must be created in one go and once you've moved onto the next layer, you can't go back to print more.
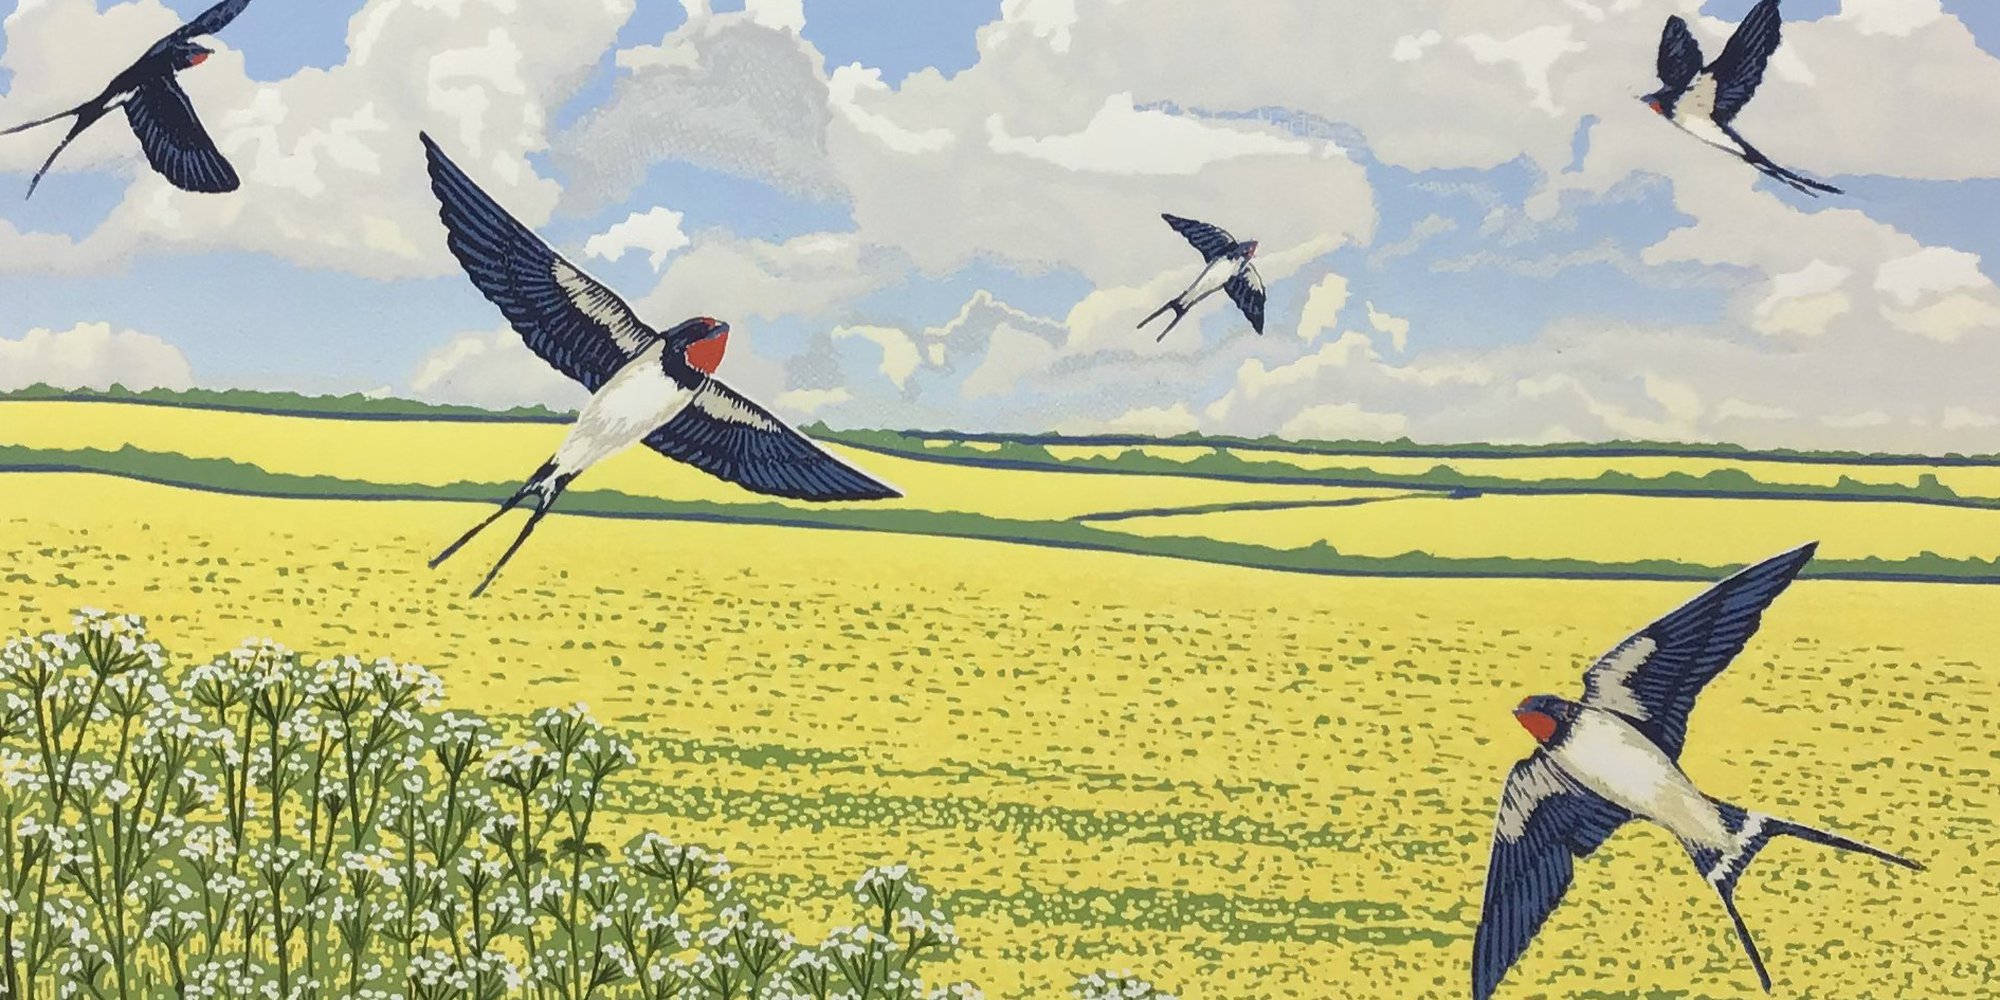
Margaret has chosen to share her latest print called 'Summer show.' Margaret says, "My prints start life as an idea, a memory, sketch or photo; this one was seeing the beautiful Norfolk countryside whilst driving".
This is a limited edition of 35 prints, using an incredible 14 colour layers. You can imagine the amount of planning and precision that goes into creating something like this and also how magical it is that every print will be ever so slightly different as the whole process is done by hand. Because this is an edition of 35 prints with 14 colours, this means that Margaret has hand-printed a total of 490 layers!
Of her inspiration for the print, Margaret says, "there’s magic in the air in early summer, when the fields are glowing with ripe rapeseed fields vying for attention with verges of frothy cow parsley and buttercups, all overseen by the first swallows of the season".
How is the print created?
Margaret explains how the process works, from initial drawing through to the all important 'peel and reveal'.
Step 1: Drawing on lino
A lino reduction print starts life as a drawing which is then transferred to a sheet of lino. The image is the reverse of what will be printed.

Step 2: First cutting
The lino is then cut away in those places which will remain white (the paper colour) and the lino is then inked and printed on a press. This is repeated for every single colour layer. You can see that it’s impossible to make more prints the same, as the lino is destroyed in the making of the print. That makes these prints truly collectible! I use Japanese vinyl to make the print – this allows fine detail to be cut, using my favourite Pfeil cutting tools in a range of sizes.
You can see some of the tools of the trade here.
Step 3: First inking
Schmincke artists inks are used for printing – they dry fast and give a pleasing matt finish printed onto lovely heavy Somerset satin paper. Once home from my drive through the Norfolk countryside, I sketched out a drawing, traced it and transferred the reverse image to the lino – so once it’s printed, it’s the same as my original drawing, and it’s now ready to start cutting. I’ll also print out on a copier a reverse image of the drawing – this helps me see where to cut the lino. I first cut all the areas to remain the white of the paper, and ink over the first colour onto the lino.
Step 4: More cutting and inking
Once printed, I’ll cut away more lino from the block so that next time it’s inked, the areas of the first colours to remain won’t get inked over. And then it’s a repeat process of cutting, inking and printing – many times, until the print is finished.
Step 5: Getting there...
After several stages of cutting and inking, the colours build up layer by layer. You can see the print reveal here – it’s not finished yet though!
And finally, I'm ready to cut away the lino ready to print the final colour. Here it is!
To see more of Margaret's work visit her shop.